
There’s something irresistible about a jar of homemade salsa — the burst of color, the aroma of fresh vegetables, and that first bite that makes you want to grab another chip. But this Party Salsa takes things to a whole new level.
The first time I tried salsa with cucumber in it, I was completely surprised by how refreshing it was. I’d always thought of salsa as something spicy, hot, tomato-y, and heavy on peppers — but the cucumber in this recipe adds this light, crisp, garden-fresh flavor that brightens every bite. It’s unexpected in the best way.
This recipe isn’t just about flavor; it’s about color, texture, and joy. With sweet peppers, Anaheim chiles, onions, cilantro, and those lovely chunks of tomato and cucumber, this salsa looks like a confetti celebration in a jar. Honestly, it’s so packed with veggies that it borders on being more of a salad than a dip — but once you taste it with tortilla chips, you’ll agree it’s exactly what every party table needs.
It’s also one of those recipes that makes your kitchen smell like summer. As it simmers on the stove, all those fresh ingredients mingle together, creating a fragrance that’s both bright and comforting.
WARNING: making Party Salsa may result in uncontrollable spoon-dipping and complete disregard for tortilla chips.
Once you’ve canned it and placed the jars on your shelf, the colors alone will make you smile. There’s something deeply satisfying about seeing rows of homemade salsa — knowing that you created something wholesome, flavorful, and ready to share at a moment’s notice.
Whether you’re bringing it to a barbecue, setting it out for family game night, or saving a few jars for winter, this Party Salsa is sure to brighten any occasion. And with its light, tangy crunch, don’t be surprised if people start asking for the recipe before they’ve even finished their first chip.
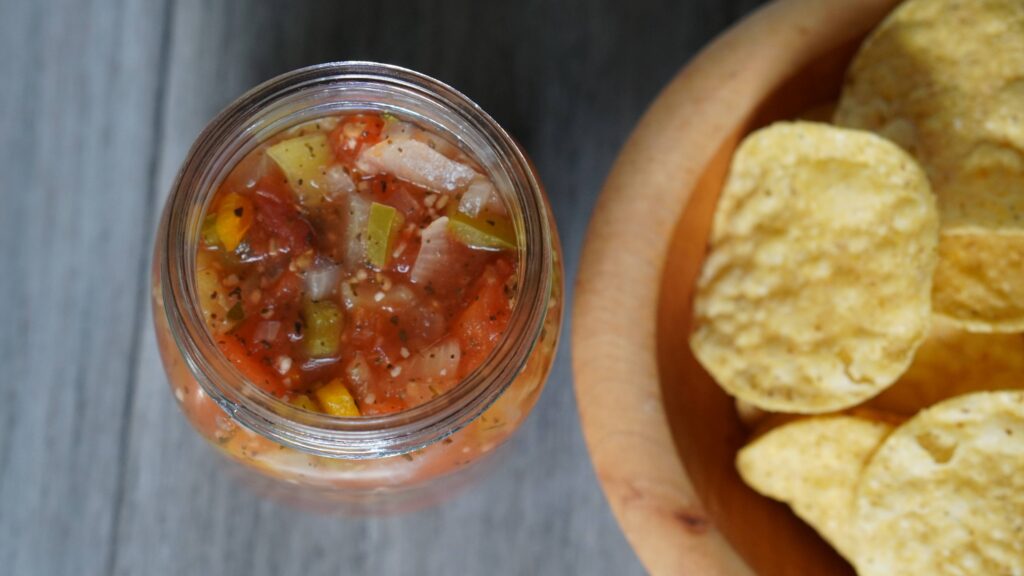
Party-Salsa-Recipe-Card
Yields: 6 pints
🥄Party Salsa Ingredients:
- 7 cups peeled, seeded, diced Tomatoes
- 2 cups peeled, seeded, diced Cucumbers
- 2 cups diced Sweet Peppers
- 1 diced Onions
- 1 cup seeded, diced Anaheim Peppers
- 1/4 cup chopped Cilantro
- 3 tbsp minced Garlic
- 1/2 cup Apple Cider Vinegar
- 2 tbsp Lime Juice
- 1 tbsp Basil
- 1 tsp Salt
🥣 Cooking Party Salsa
Place all of your fresh, colorful ingredients into a large pot and bring the mixture to a gentle boil over medium-high heat. Once boiling, reduce the heat and let it simmer for about 10 minutes, stirring occasionally. Your kitchen will start to smell amazing—bright, tangy, and just a little bit spicy!
🫙 Preparing Your Canning Equipment:
While the salsa simmers, it’s time to get your canning supplies ready.
Fill your boiling water bath canner about halfway with water and set it on the stove over low heat. You just want it to stay warm—not hot—until you’re ready to process the jars.
Gather your tools so they’re within easy reach:
Having everything prepared will make the canning process smooth and enjoyable.
🔥 Filling and Processing the Jars of Party Salsa
- Using your jar funnel, carefully ladle the hot salsa into pint jars, leaving about ½ inch of headspace at the top.
- Slide a chopstick or bubble remover along the inside of the jar to release any trapped air bubbles.
- Wipe the rims with your clean, damp cloth to ensure a perfect seal.
- Place the lids on the jars and screw the bands on fingertip-tight—snug but not too tight.
Place the jars into your boiling water bath canner and make sure the water covers them by at least one inch.
Process for 15 minutes if you’re at sea level, adjusting your time for higher altitudes as needed.
🌡️ Cooling and Storing:
When processing is complete, turn off the heat and remove the canner lid. Let the jars rest in the hot water for 5 minutes before lifting them out.
Use your jar lifter to carefully remove each jar and set them on a heat-safe surface, spacing them about an inch apart. Allow them to cool undisturbed for 24 hours while the lids seal with that satisfying little pop!
Check your seals the next day. Any jars that didn’t seal properly should be refrigerated and enjoyed right away.
Store your sealed jars in a cool, dark pantry and enjoy them over the next 1–3 years. For the best flavor and quality, aim to use them within the first year.